Hibiscus is always a favorite of mine. No matter the season, those vibrant, tropical blossoms make it feel like summer. The best part? You don't need to buy new plants every year.
I'm going to show you how to propagate hibiscus easily from cuttings. It's fun, enjoyable, and, to be honest, one of my favorite gardening tasks!
Tools You Will Need
Before you start propagating your hibiscus, you will need to prepare some tools. Here’s what I use when propagating my hibiscus:
A sharp knife or a pair of scissors — Use to make clean cuts on the hibiscus stem.
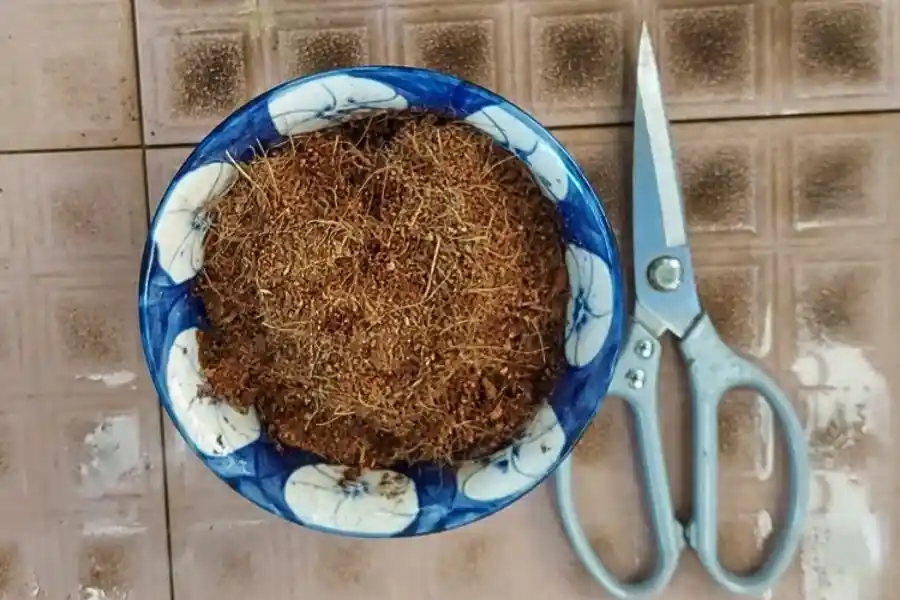
Rooting medium — This can be water hyacinth roots, soil, or coconut coir. It’s the material where your cuttings will grow roots.

Plastic bags — Choose the type of bag (as shown in the picture) to wrap around the cut section.
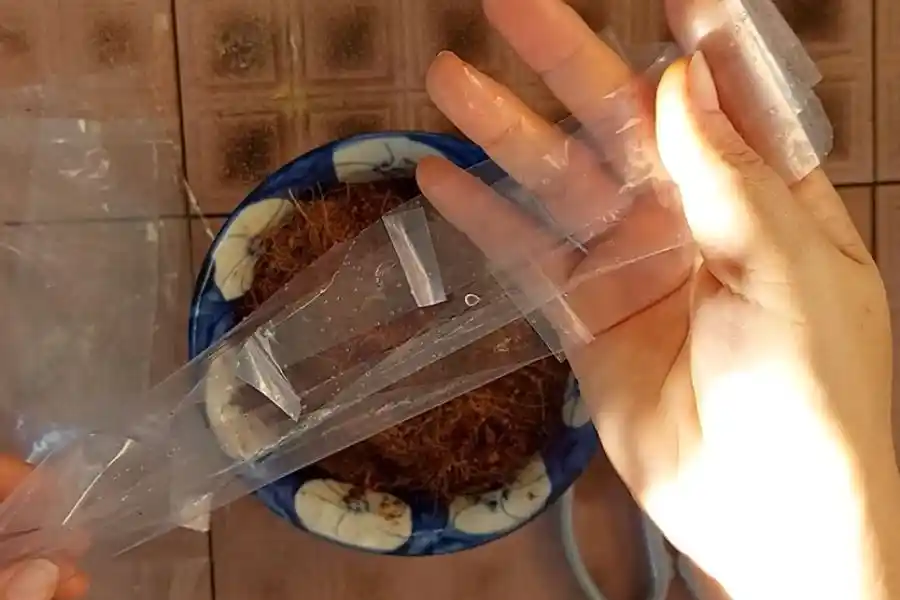
Strings – To keep the soil ball in place. I often cut strips from a plastic bag to use as ties — Easy and simple!
After gathering them, you're ready for the next exciting part: propagating and seeing those cuttings grow.
How to Propagate Hibiscus
The first step is to choose a suitable stem for propagation. You can't pick a random one. Below are some things you should focus on:
Step 1 – Choose Good Stems for Cuttings
- Pick a stem that’s not too young and not too old, and about 50 cm (around 20 inches) long.
- I often take a cutting right after the hibiscus has finished blooming.
- I also avoid picking the stems that are too low to the ground, growing right at the top, or diseased stems.
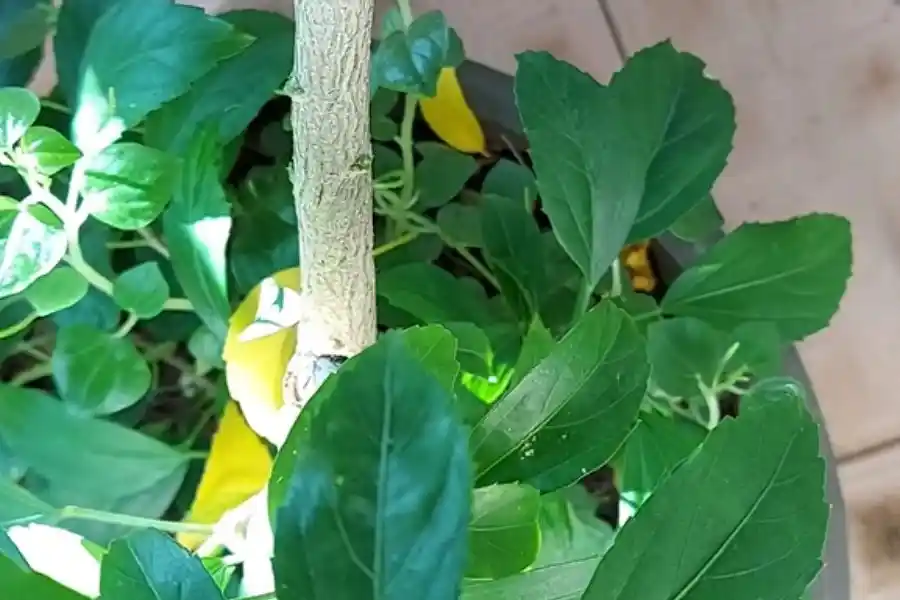
- I like to choose stems in the middle of the plant. You will see that those are thick, healthy, and have many green leaves.
- Stems with a diameter of about 1.5 – 2cm are ideal. The bark on the stem shouldn’t be too dark or too green, either!
You can move on to the next step once you’ve picked the perfect stem!
Step 2 – Prep the Stem for Rooting
First, I will remove all small side stems and leaves around the spot I want to make a cut. This will make it easier to work.
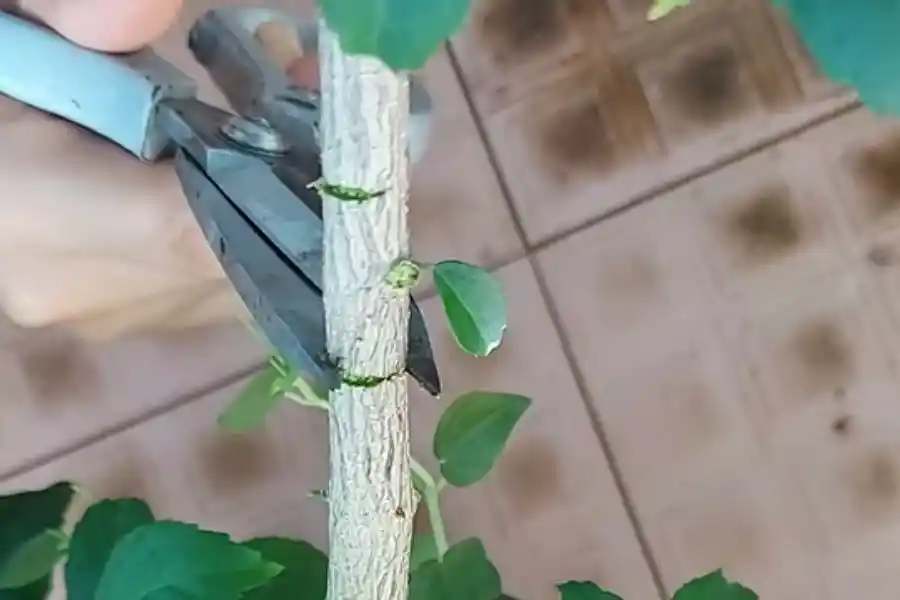
Next, I use a sharp knife and carefully cut a ring around the stem to remove the outer bark. The band should be about 3 – 5 cm wide. Cutting about 10 – 15 cm from the base will be perfect.
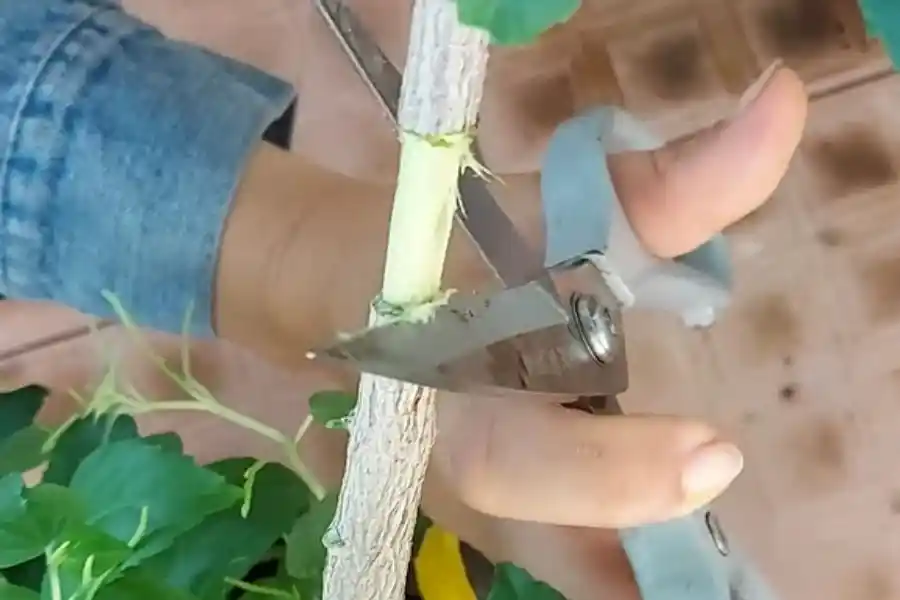
Then, I use the tip of my scissors to scrape off the sticky and slimy layer on the cut wood. Get rid of any plant sap or green fibers left on the surface.
| My Pro Tip: I always leave the cut part dry before wrapping it for rooting. I often leave it there for about 2 days. But if the plant has so much sap, you should let it dry completely for about a week. |
Step 3 – Make a Root Ball
And now, this is the exciting part. Are you ready to make a little root ball?
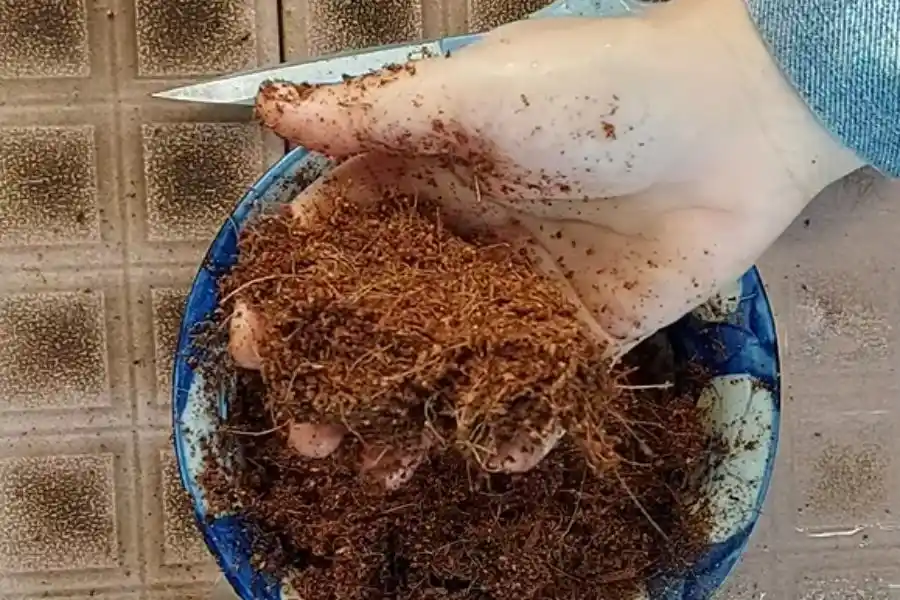
First, I prepare the coco coir (or whatever medium you’re using). I soak it in water (75 – 80% humidity is great).
My simple trick: Grab a handful of coco coir and squeeze it. If there's no water dripping out between your fingers without crumbling, it’s perfect for wrapping.
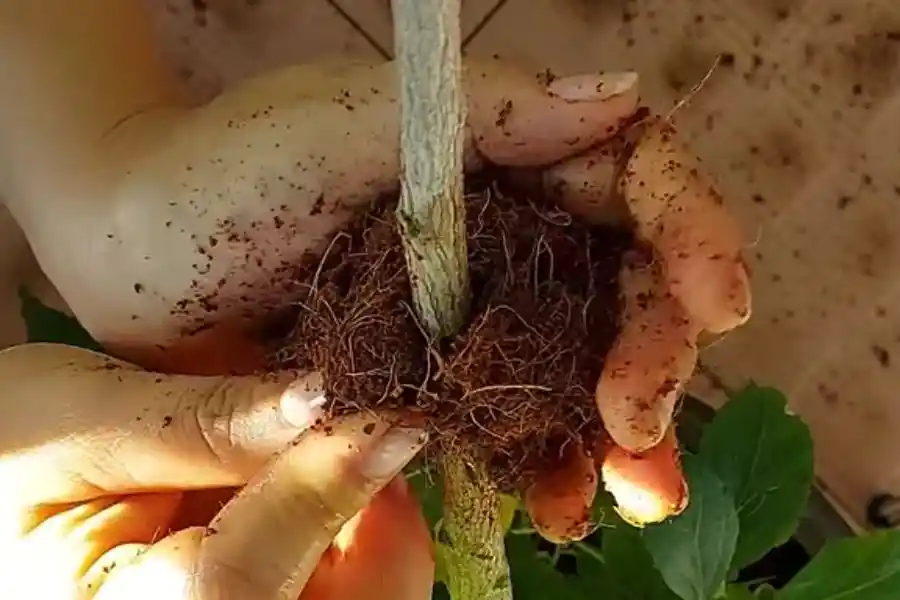
Next, I take that moist coco coir and press it evenly around the cut.

Then, I use the plastic bag and carefully wrap it around the coir.
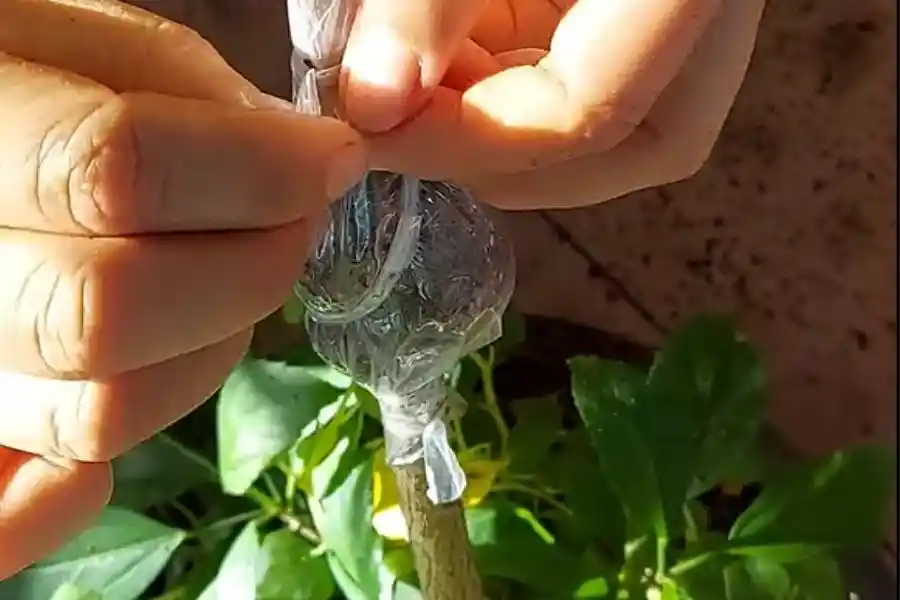
Finally, I use strings to tie both ends of the soil ball tightly. You need to make sure the ball doesn't move or spin around on the stem. And that's it!
Step 4 – Wait for Roots to Grow
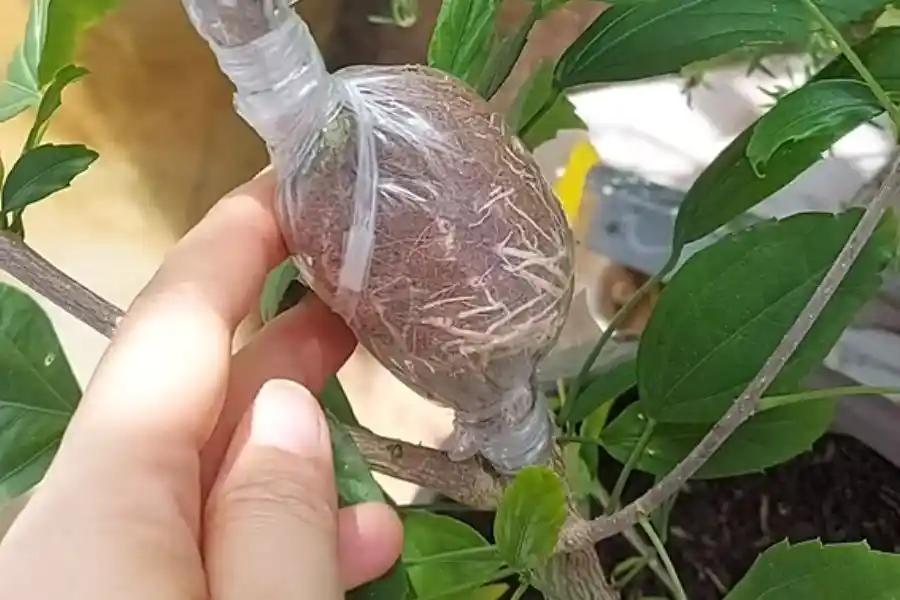
You have to be patient. The roots will start to grow inside the little ball around 25 to 30 days. The hibiscus roots rather quickly; it may take 45 to 60 days, depending on the variety and season.
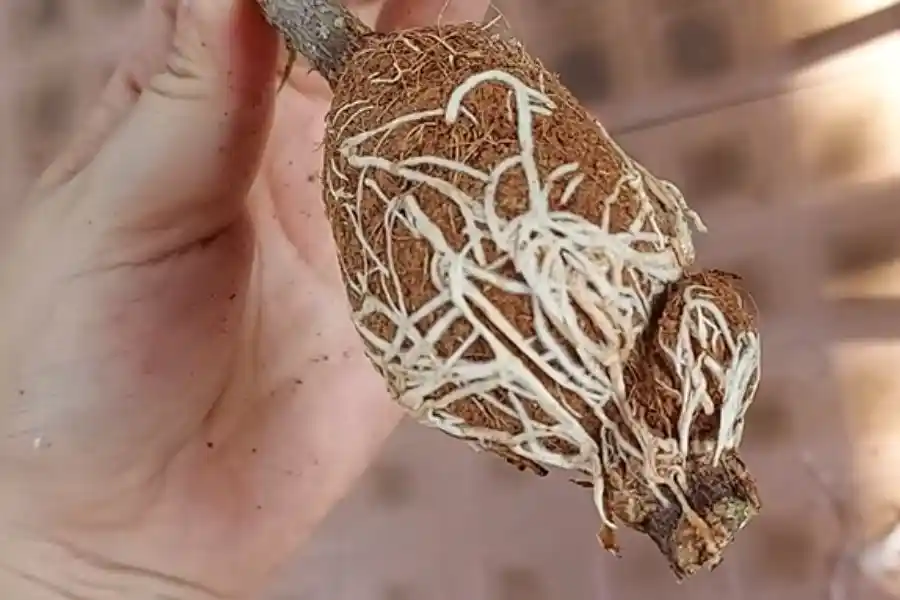
I like to check the root ball from time to time. The roots are first white and soft. Then, they will become rather pale yellow or greenish after about 2 months. That's the time to cut the ball and move it to the ground.
You can also do this when seeing about 3 to 5 strong, healthy roots in the ball.
Step 5 – Grow a New Hibiscus Plant
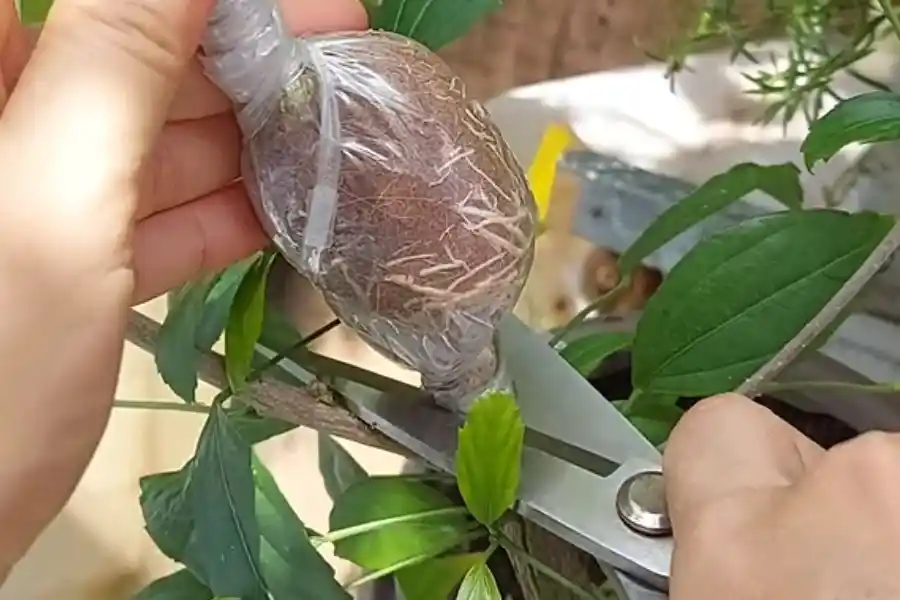
And now, it's time to cut the soil ball and give it a new home! I carefully use scissors to snip the cut just below the root ball.
Don't forget to peel away the plastic wrap before planting in the ground.
I always remove any old, yellow, or pest-damaged leaves before planting. This helps the plant focus on growing stronger.
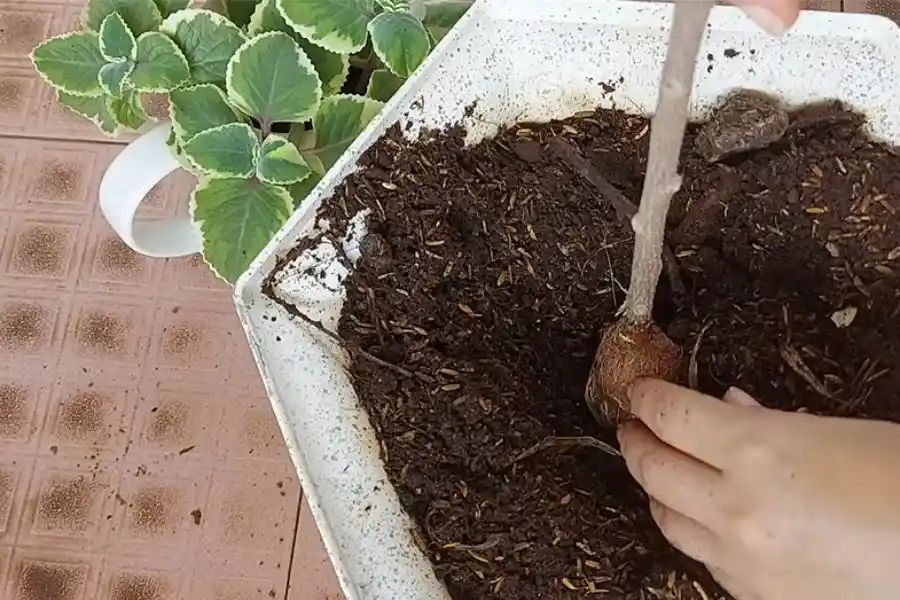
I grow mine in a big pot because I want to shape it into a nice tree form. But you also can pop yours into a smaller container, with a diameter of around 6 inches (15cm). Just make sure it has good drainage holes.
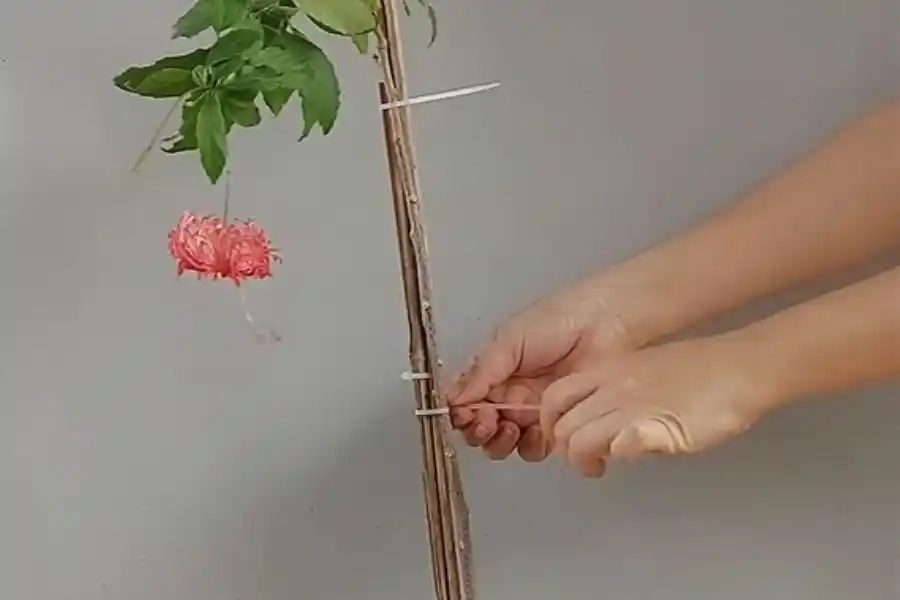
And finally, I use a stake and place it next to the hibiscus plant. I tie it with a zip tie to help it stand upright. This is a simple way I apply to help the hibiscus have a good tree form.
I also water it lightly after planting to help the soil settle.
| My Advice: To help my hibiscus grow healthier, I add a little amount of organic fertilizer to my potting mix. You can use worm castings, chicken manure, or cow manure. |
Tips to Care for Hibiscus After Propagating
In my experience, the right care for your new hibiscus cutting in the first few weeks makes a big difference. Here's how I keep mine growing strong:
- Keep the plant in the shade for the first 10–15 days. I always place my hibiscus somewhere with indirect sunlight or under a shade cloth. This keeps the plant from wilting while it’s adjusting.
- I water it every 2 days to keep the soil slightly moist, but not soggy.
- After that, I will move my hibiscus to a sunny spot for better growth.
Around 30 days later, I feed it with a diluted purple NPK fertilizer (which is made specially for hibiscus blooms).
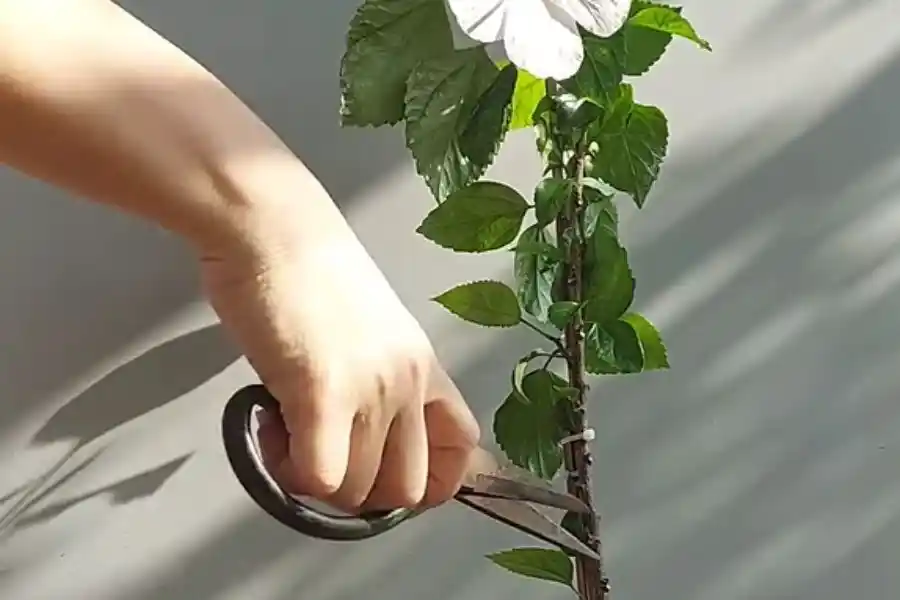
| Tips to Make A Hibiscus in a Tree Shape: After about a month, I remove any side shoots growing from the main stem. This keeps the plant tidy and has a tree-like shape. |
Summary
And that's exactly how to propagate hibiscus plants at home. I love to see those tiny roots growing in that soil ball. You must take your time to wait, but it's totally worth it. Give it a try by yourself!