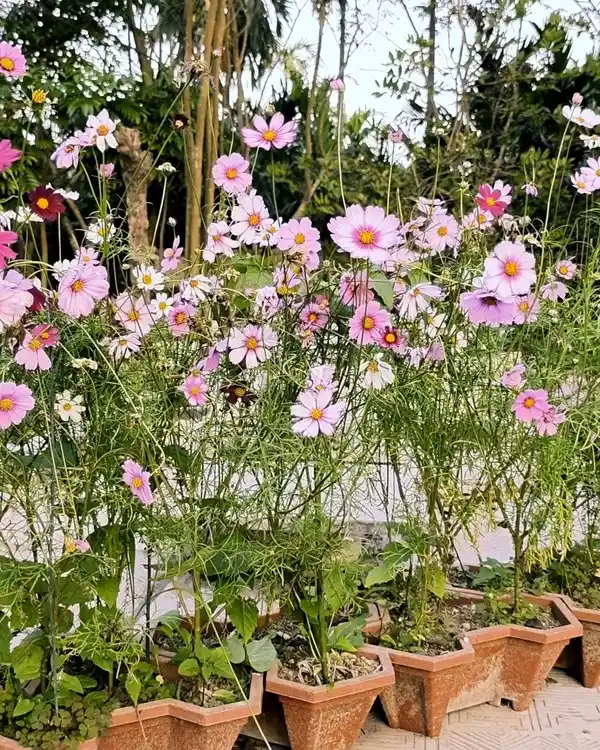
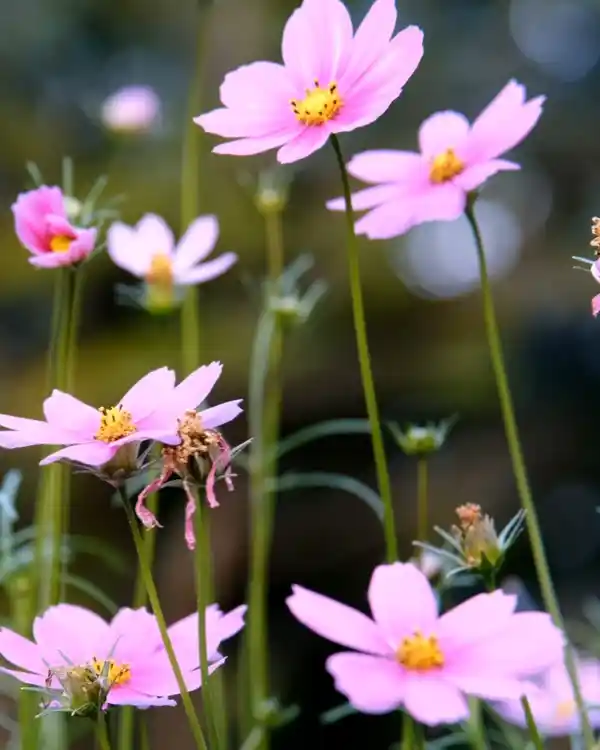
Cosmos flowers are such cheerful little blooms—they light up any space with color and charm! Growing them doesn't take much effort either. I grow them in pots, and it's honestly one of the easiest and most fun ways to enjoy flowers.
Let me walk you through every step I take to grow cosmos from seed to full bloom.
Let's dig in and get growing!
Why I Grow Cosmos Flowers in Pots?
Before I start sowing seeds, let me share why I choose pots over garden beds.
Sometimes, I get tired of digging in the garden. Growing cosmos in pots gives me more freedom. I can move them around and decorate different corners of my home.
Whether it's a porch, a balcony, or a sunny window, potted cosmos make it easy to add a splash of nature wherever I want.
How to Grow Cosmos: Step-by-Step Guide from Seed to Bloom
Cosmos are not only easy to grow, but they're also great for decorating any space. I like to grow them in pots because I can move them around wherever I need a splash of color.
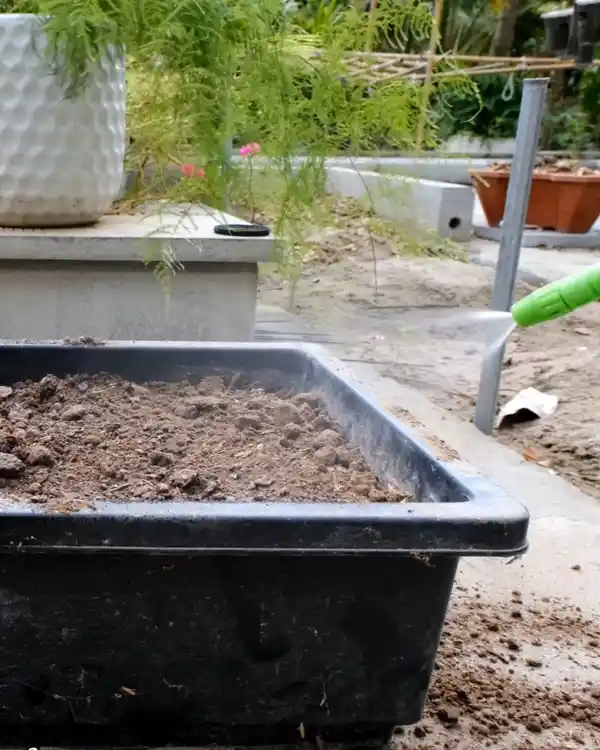
Step 1: Sow the Seeds
This first part is always exciting—getting the seeds into the soil!
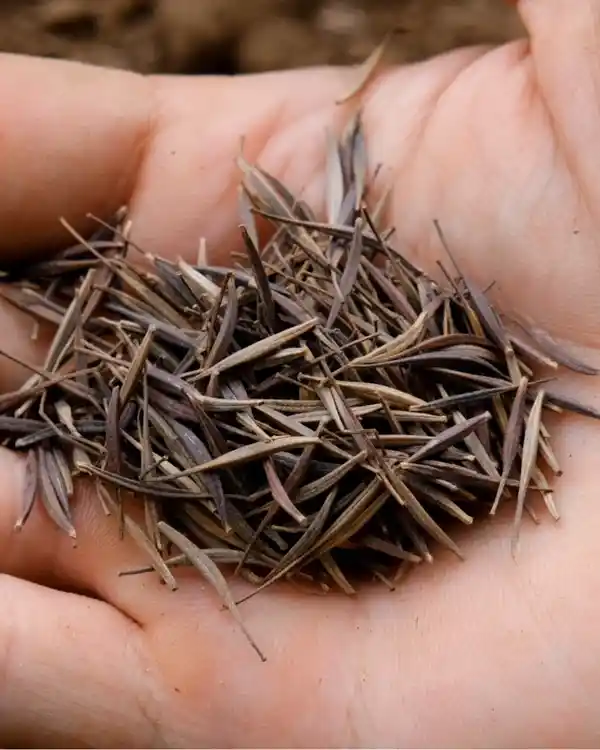
I use a black pot and sprinkle the cosmos seeds evenly across the surface.
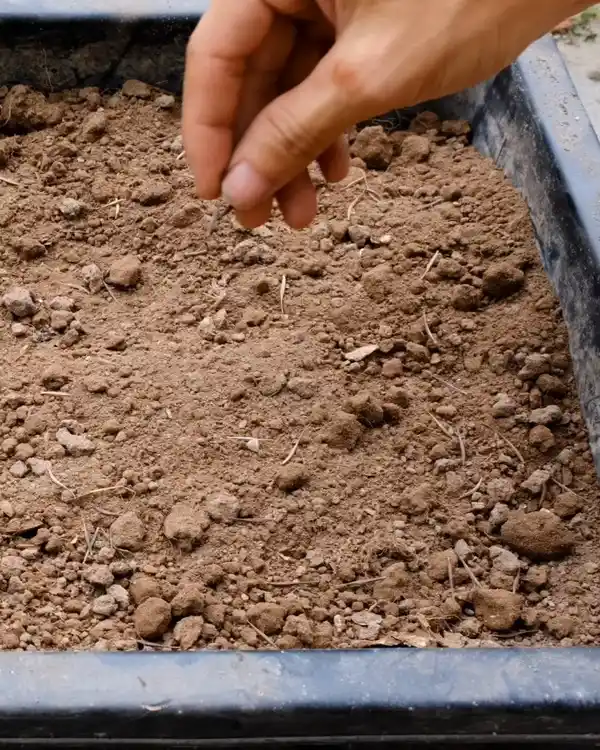
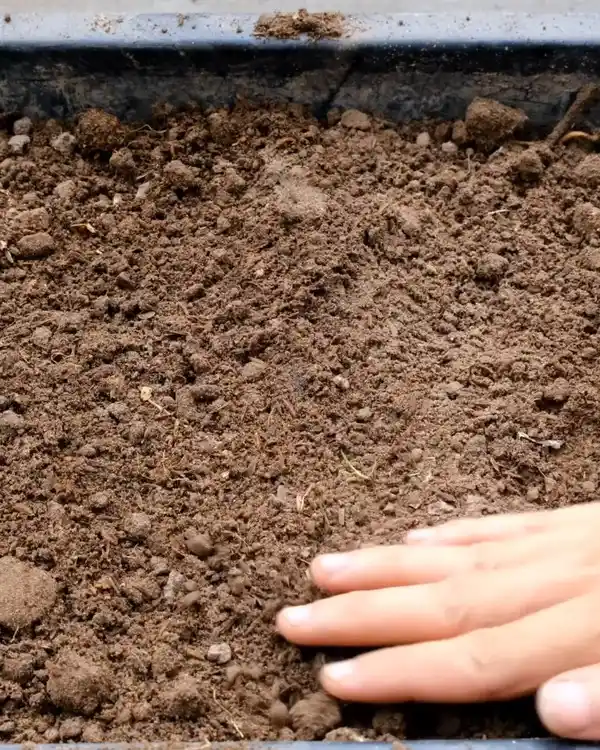
Then, I lightly cover them with a thin layer of soil.
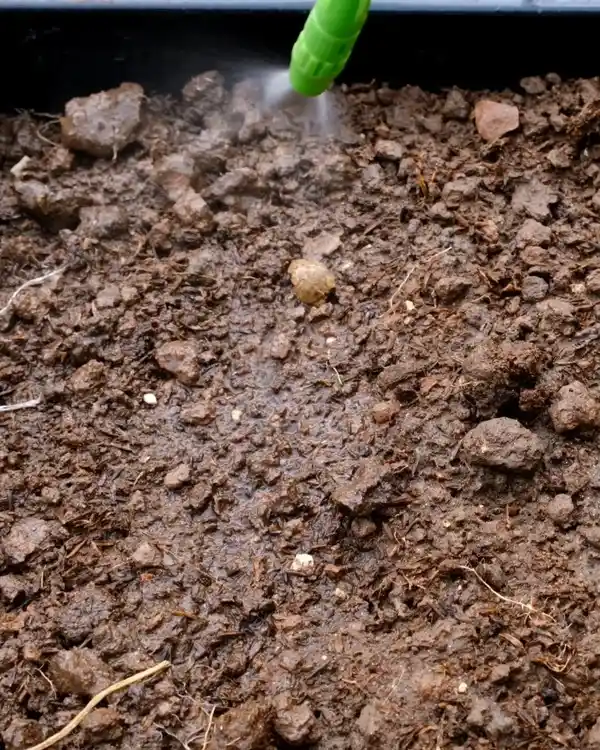
No need to soak cosmos seeds before planting—they're super easy to grow!
They sprout quickly, usually within 2 to 3 days. I just keep the soil moist every day. I mist the surface of water gently using a watering can.
I make sure to keep the pot in a shaded area, too. If the soil starts to look dry, I water it again. Moisture is key here!
Step 2: Let the Seedlings Grow
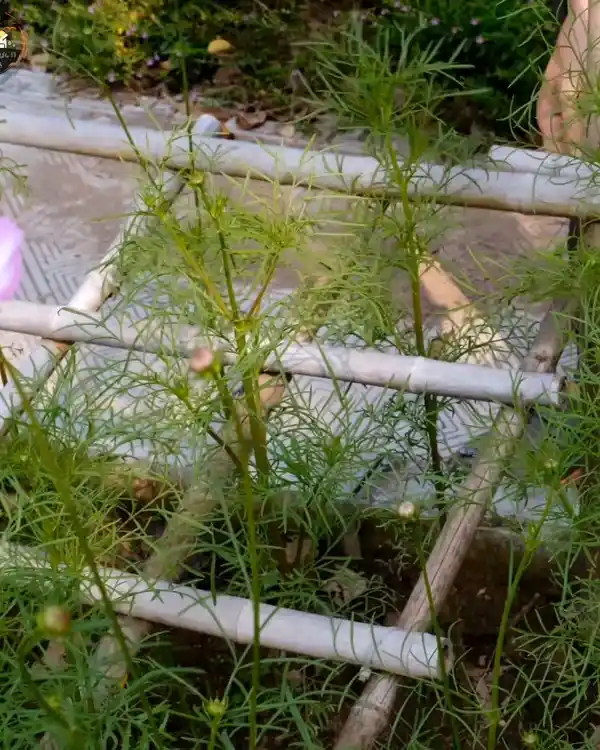
After sowing, I let the seedlings stay in the black pot for about 20 days. You can transplant them sooner, after just 10 days or around two weeks.
I was busy, so I waited 20 days before moving them.
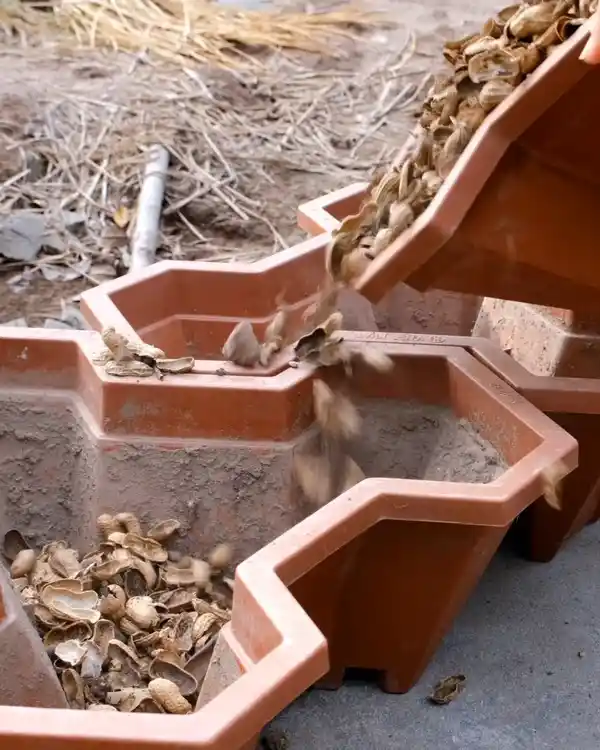
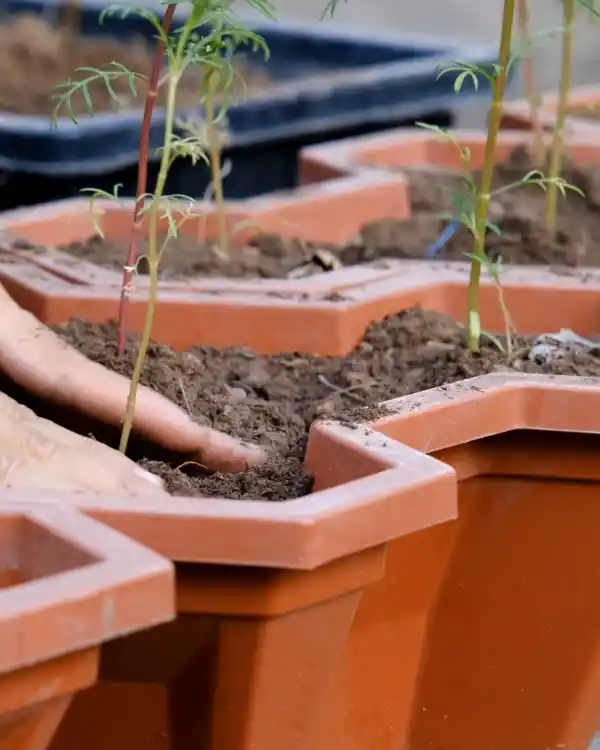
Now comes the fun part—preparing the growing pots! I grab six planting pots and line the bottom with a draining material.
I usually use peanut shells. But you can use anything that drains well, like charcoal slag.
Then, I fill the pot with soil already mixed with organic fertilizer. This way, the cosmos seedlings get the nutrients they need right from the start.
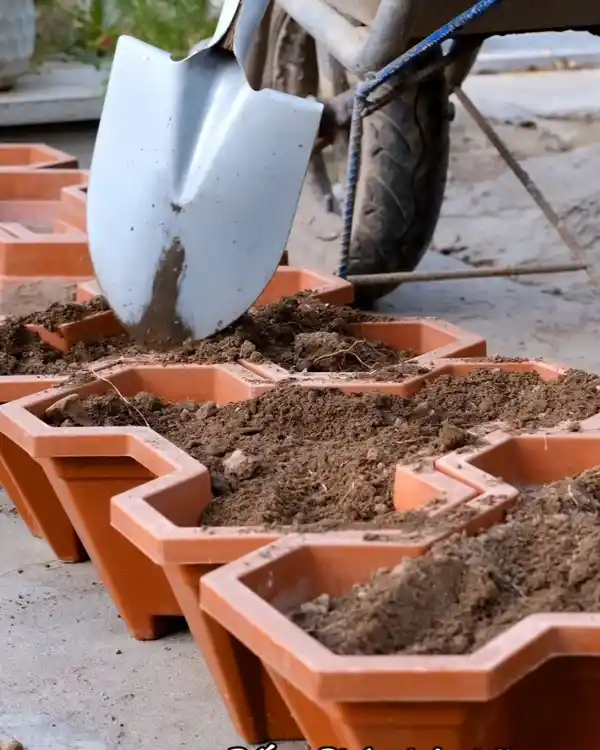
I gently move the seedlings into these new pots from the black seedling pot.

Of course, if you like, you can sow the seeds directly into your final growing pots. That works, too! Make sure you space the plants well, depending on how big your pots are.
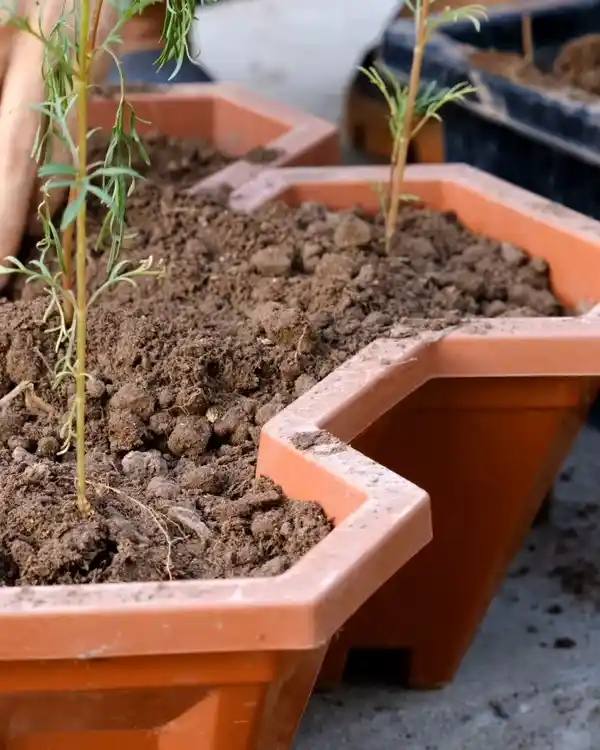
My pots are divided into four sections, so I plant in four spots. I had 24 seedlings in total and used 16 pots.
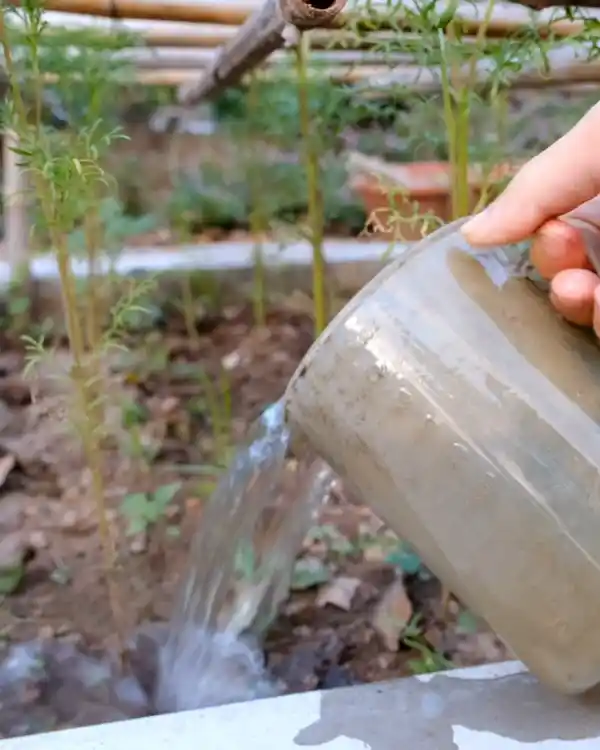
Step 3: Water Daily and Pinch the Tips
Once I transplant the seedlings, I start watering them daily. Keeping up with this routine helps them grow strong and healthy.
Because I transplant a bit late, some of my seedlings are already tall. The very next day, they are ready for pinching!
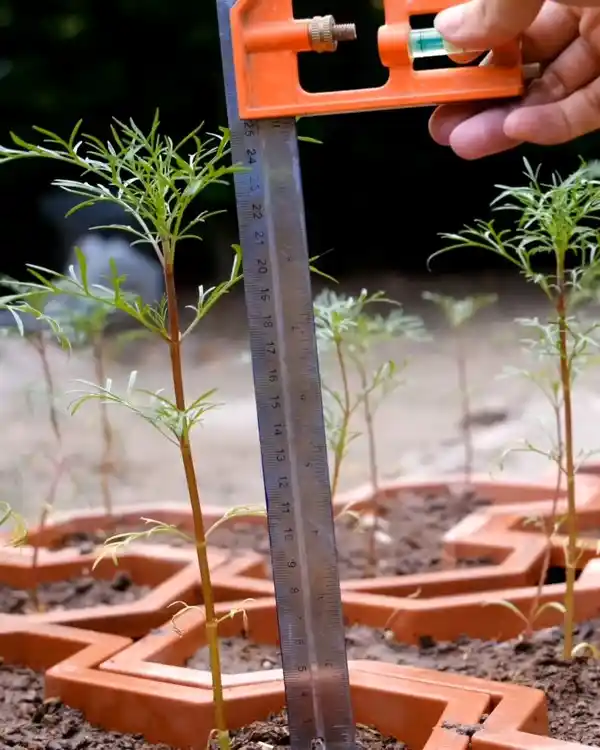
You can start pinching the tips when your cosmos plants reach about 20–25 cm tall. I either use my fingernails or a pair of scissors to pinch off the tops gently.
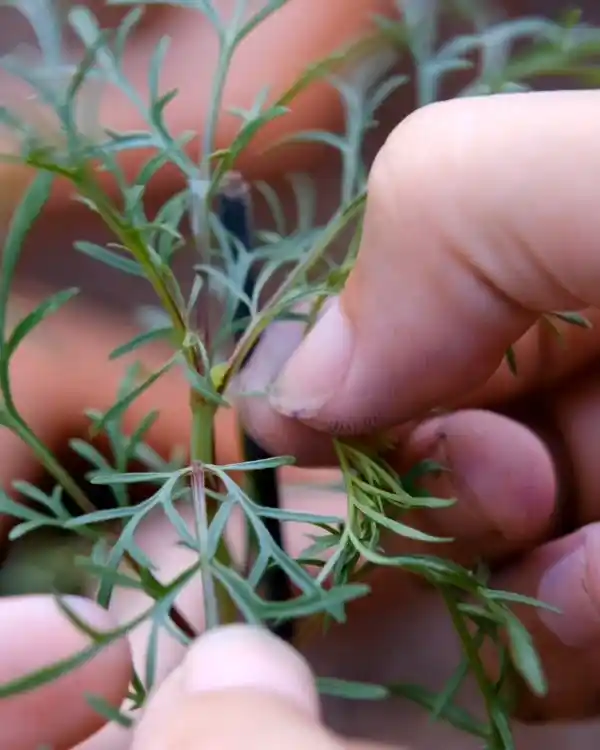
About two weeks later, I do a second round of pinching. Since the main tip is gone, the plant branches out more.
Those new branches? That's what I pinch next.

Just a tip—pinching is only necessary if you grow your cosmos sparsely in pots. This helps them grow more flowers.
Pinching isn't needed if you plant them densely or in large areas. More plants mean more flowers, naturally!

Step 4: Fertilize Wisely
I don't add any more fertilizer after transplanting because the potting soil already has organic fertilizer mixed in. If you want to add more later, that's okay too—just don't overdo it.
Cosmos don't need a lot of nutrition. Too much fertilizer can make them grow tall and leafy, which makes them more likely to topple over. And honestly, they'll produce fewer flowers.
Less is more here! Fewer leaves usually mean more flowers. That's the charm of cosmos!
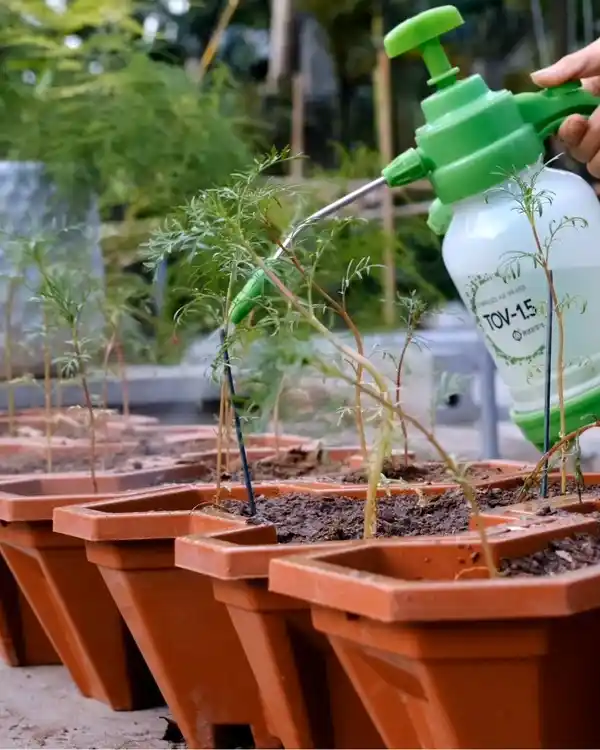
Step 5: Boost Blooming with the Right Fertilizer
Once the plants form buds, I switch to a fertilizer supporting flower growth.
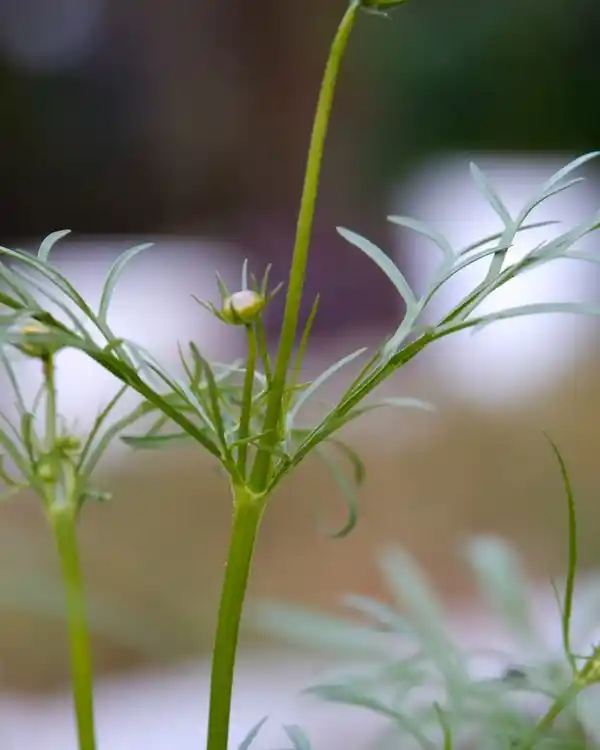
I use a liquid fertilizer with a high phosphorus and potassium ratio, like a 6-30-30 mix. Phosphorus (P) and Potassium (K) are great for blooms!
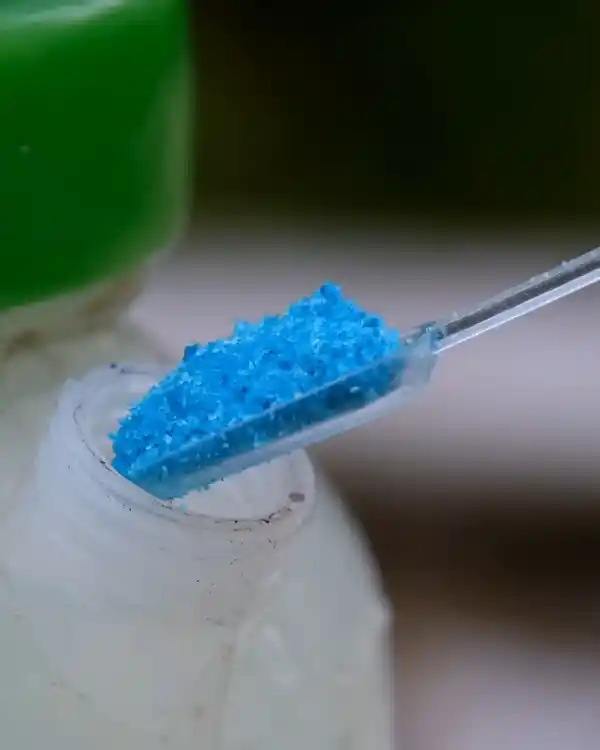
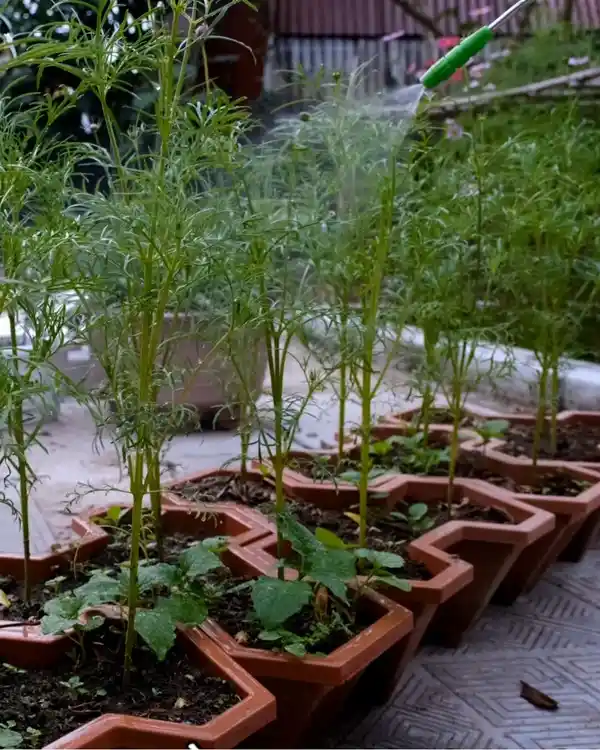
I mix this fertilizer in a spray bottle, following the product's instructions.
If you use granular fertilizer instead, sprinkle it around the plant base, cover it lightly with soil, and water it.
Step 6: Enjoy the Bloom!
Then all that's left is to wait—and enjoy! Cosmos usually take one to two months from their first bloom until they fade. Depending on how well I care for them, I enjoy a long season of cheerful flowers. It's such a joy to see them bloom!

Pro Tips for Growing Cosmos Successfully
Even though cosmos are easy to grow, there are a few things I always keep in mind to make sure everything goes smoothly.
1. Pick High-Quality Seeds
Trust me, not all seeds are equal! I always look for fresh, quality seeds. I prefer buying from gardening groups on Facebook, where sellers are more reliable.
One brand I trust is FVN. They may be a bit pricey, but they work well and can be bought from almost anywhere.

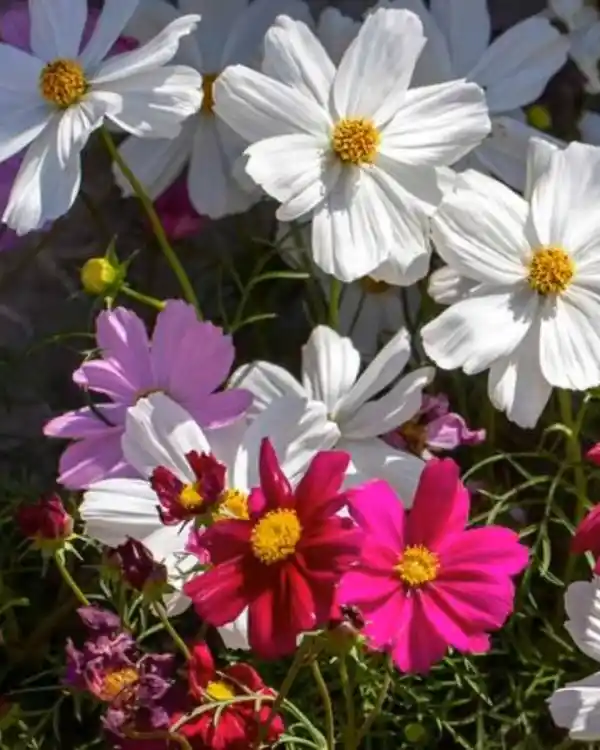
It's also essential to pick the right variety for your climate. For instance:Red, pink, white, or purple cosmos from the US don't handle Northern Vietnam's hot summers well. I plant those only in spring, fall, or winter.
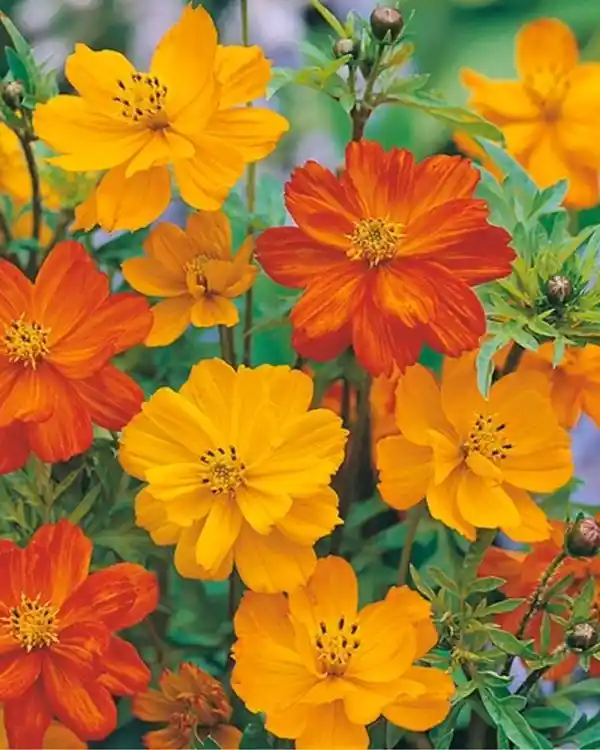
Yellow or orange varieties are tough! They grow well all year round and don't topple easily.
2. Keep Them Upright
Cosmos can fall over in strong winds or heavy rain. I use bamboo sticks or small ropes as support. You can also build a small roof to protect them from too much rain.
If I'm growing them in pots, I simply use a stake for each plant. That's the fastest way.
3. Water at the Base Only
When I water cosmos, I always aim at the base. Watering the leaves or stems can make them fall over more easily.
4. Don't Overdo the Fertilizer
Cosmos grow better in poorer soil! When they're young, they need a little nutrition. But once they're mature, I ease off the fertilizer.
5. Plant in Bulk for a Bigger Impact
A single cosmos plant looks okay, but when you grow a bunch—wow! A full field or even just a group of pots bursting with color is breathtaking.
Roses might look great alone, but cosmos shine best in crowds!

6. Watch Out for Leaf Curl Disease
This is something I've seen happen a few times. If your cosmos leaves start curling, it's likely caused by thrips or aphids.
These pests can stop the plant from flowering.
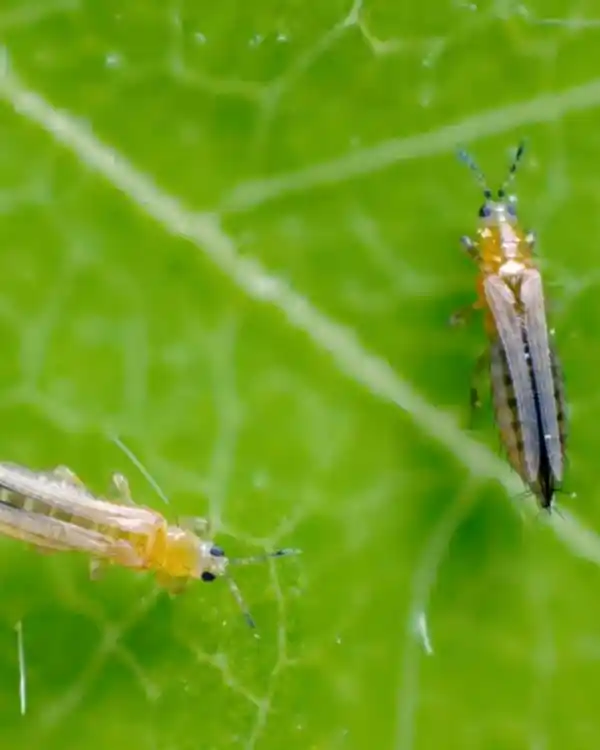
I act fast when I see signs of trouble. I tend to use organic bio products most of the time.
If that doesn't work, I use chemical pesticides for quick results.
The Bottom Line
I hope this guide on how to grow cosmos inspires you to bring these joyful flowers into your space. Growing cosmos is truly rewarding once you know the proper steps.
With some care and patience, you'll enjoy their bright blooms for a long time. Keep these tips in mind, and your cosmos will thrive beautifully!