One of my favorite simple joys every day is sipping a warm cup of calendula in the morning. And what I mean is that I use calendula I grew myself.
I also made some oil from calendula and gave it to my sister (it helps to soothe dry skin). Those little flowers are pretty and super easy to grow. Don't go anywhere because I'm going to tell you how to grow and use calendula.
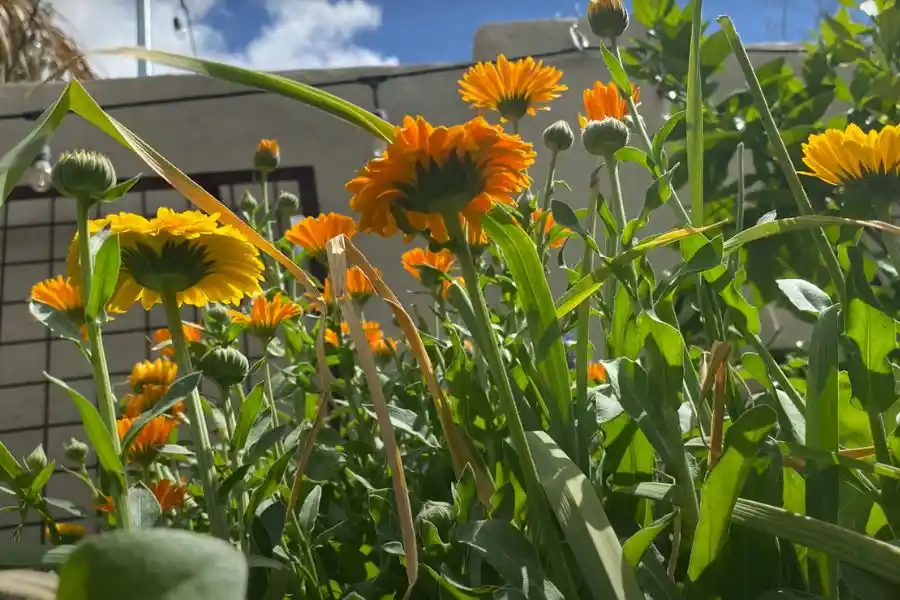
Grow Your Calendula Around the Garden
I like to tuck a calendula plant in almost every garden bed I have. It thrives in either full sun or partial shade. You know, it grows well wherever you place it.
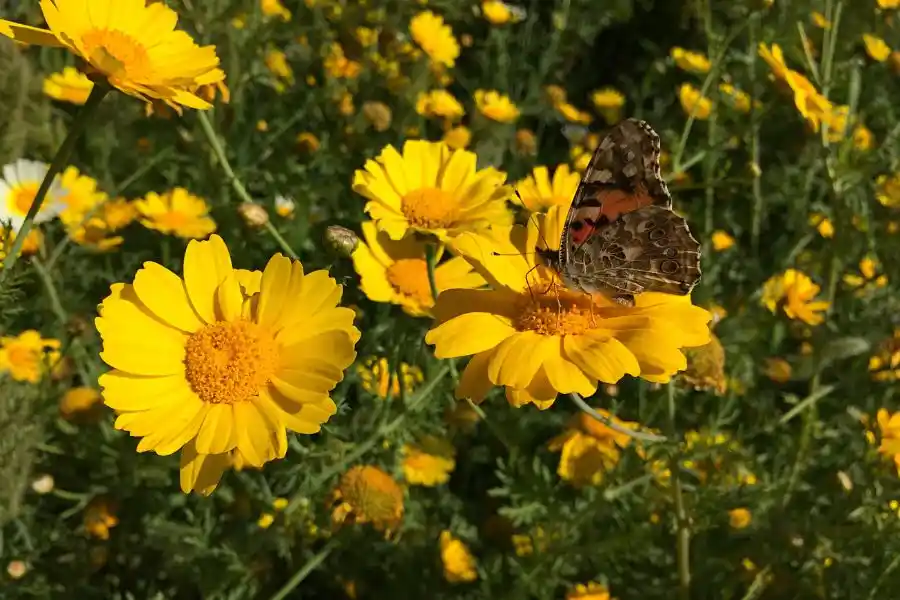
One of the best things I love about calendula is how it attracts helpful bugs. Around the blooms, I frequently see bees, butterflies, and even tiny hoverflies buzzing.
These tiny guests keep the pests away and help pollinate my vegetables. It's like having little garden assistants that you don’t have to pay or feed!
If you have space in your garden, I highly recommend adding a few calendula plants. You’ll be surprised how much good they can do.
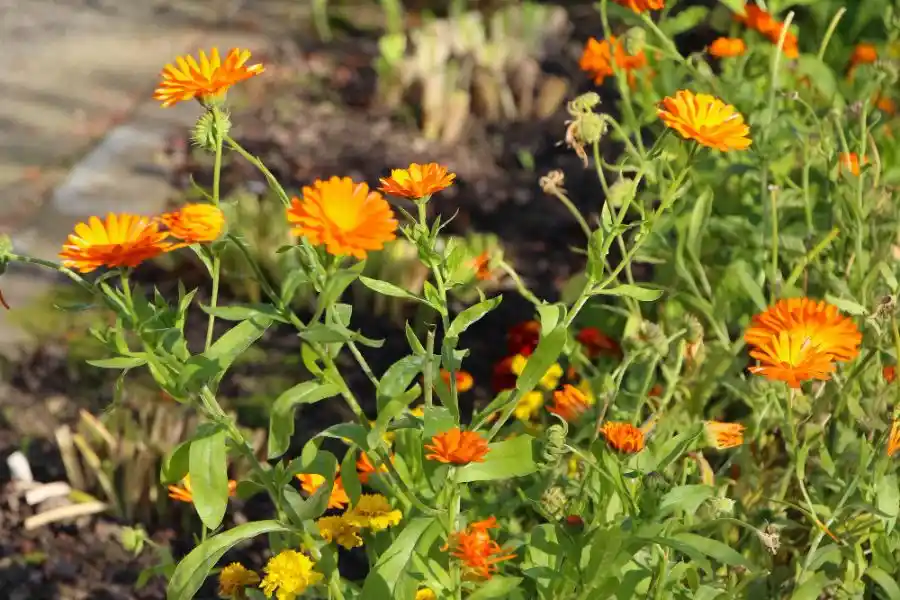
| Do You Know? Calendula flowers typically come in yellow and bright orange colors. You can also find them in red, white, and pink.Calendula is a great companion for vegetables. That's why I always grow them near my carrots, broccoli, potatoes, and sprouts. |
Pick The Right Time To Plant Calendula
Calendula (or pot marigold) prefers cool temperatures. And the secret I've learned to getting a garden full of colorful calendula blossoms is to pick the right growing time.
Below are some tips that can help you:
- 60–80°F is the best temperature for calendula to grow
- Remember to sow your seeds just before the last spring frost
- If you live in hot, mild-winter areas (like Arizona), you can plant seeds or transplant plants outdoors between mid-September to November.
- Plant your seeds about ¼ inch (6 mm) deep in rich and well-draining soil
I always ensure to keep the soil moist until those seeds sprout.
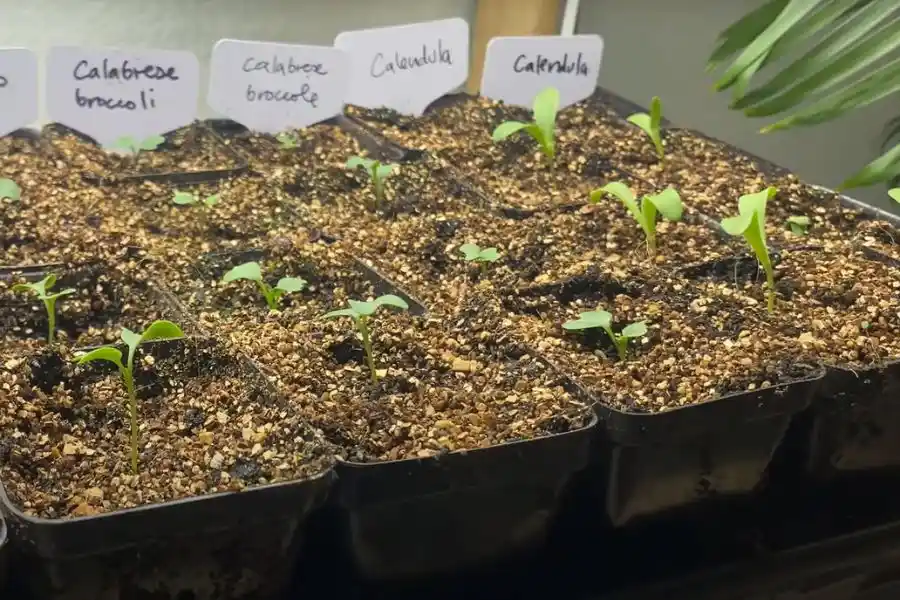
- As seedlings appear, I will thin them out 6–12 inches (15–30 cm). That will be great for airflow and growth.
- I often plant 1 to 4 calendula plants/ 1 square foot
Simple, right? Once you catch the rhythm, calendula practically plants itself.
Calendula’s pretty easygoing. Here’s what I do to keep my plants healthy and happy:
- I like to water calendula regularly. Don’t let the soil dry out completely.
- I also frequently deadhead spent flowers to boost new blooms. Trust me. The more you prune, the more it flowers!
- No extra fertilizer needed (I love this!). Calendula grows well even in average soil.
- When I notice my plants look tired or leggy, I cut them back to about 3 inches (7.5 cm). You will see new growth coming soon.
| Bloom Time: Typical in spring and summer. Some bloom in fall. |
Watch Out For Powdery Mildew
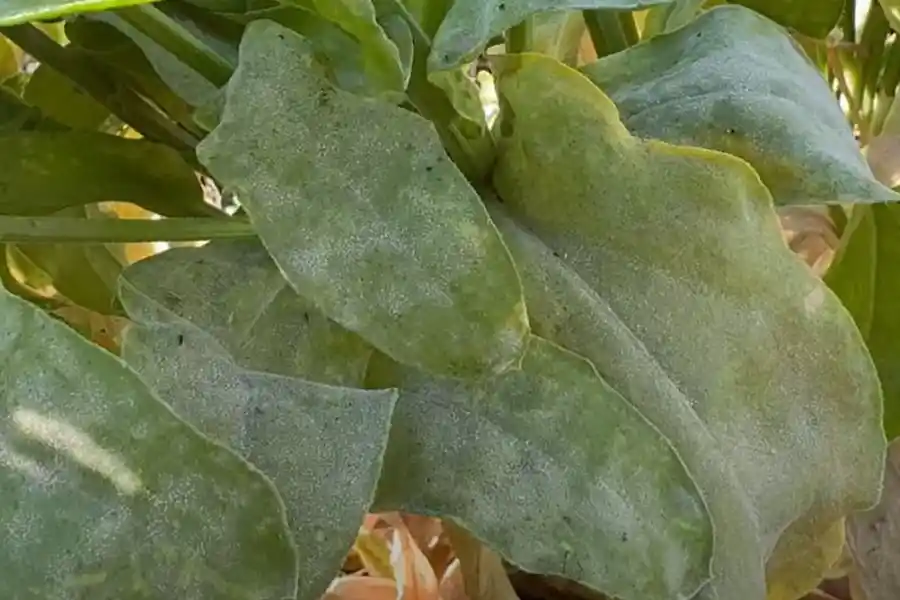
This is what I encountered when I first grew calendula. Powdery mildew can occur in damp or crowded places. You need to treat it once you spot the issue. Good air circulation can help.
But if a plant is too badly diseased, you need to remove it. Do not compost it as this will spread the disease.
I sometimes notice some slugs and snails. They like to eat the young plants the most. I solve this by removing all the debris to keep the ground clear.
Harvest Your Calendula
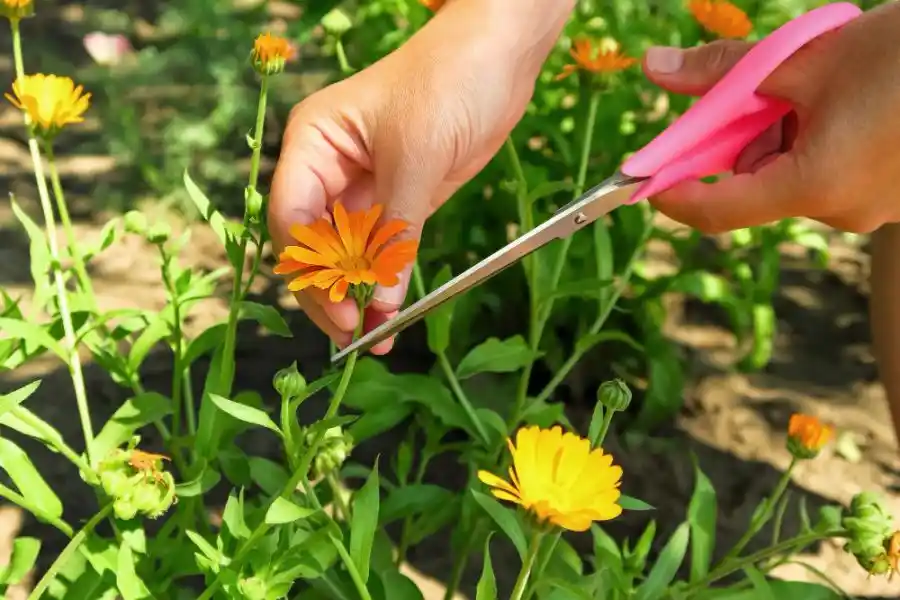
I prefer to collect blooms when they are new, fresh, and just fully opened. They are at their most colorful and ideal for drying or using right away.
Flowers that start to dry out or turn into seeds are not ones I pick. I let them grow naturally by leaving them on the plant.Calendula enjoys reseeding itself during the growing season. New small shoots often appear where I don’t expect them most.
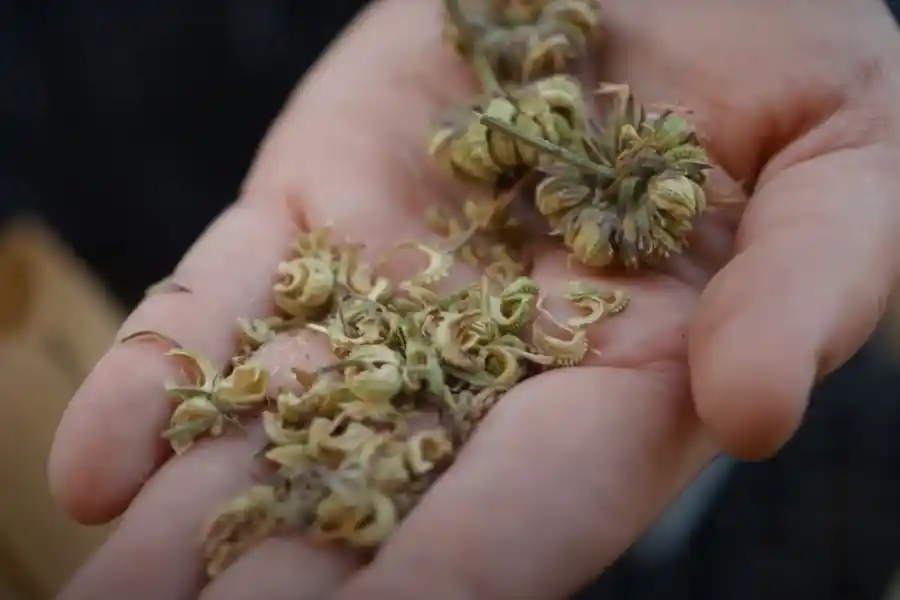
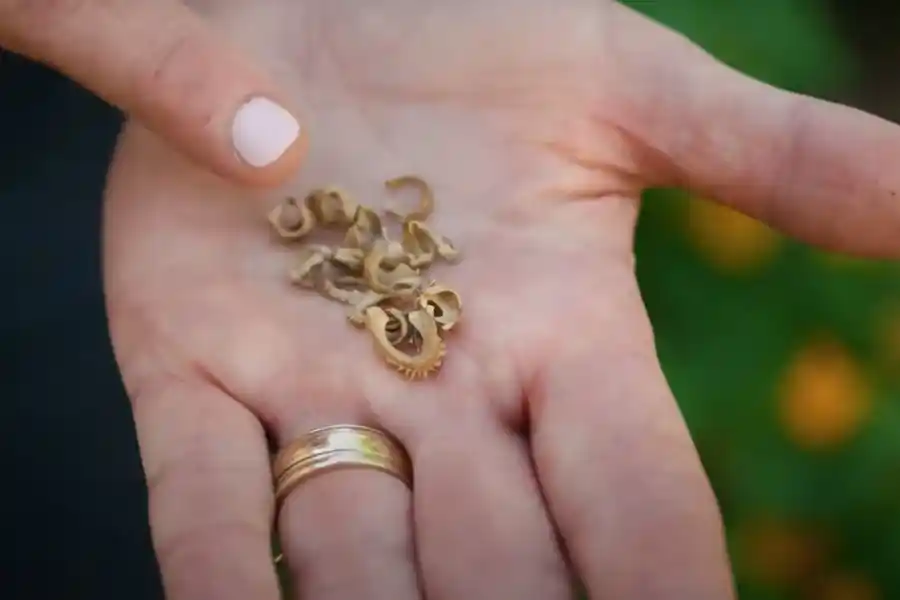
If you like to save calendula seeds (just like me), wait until the blossom heads are dried and brown. That’s when the seeds are ready to collect.
Don’t forget to label your seed jars with the harvest date. You can keep them for a few years.
How to Use Calendula After Harvesting

My favorite part is here. I know exactly what goes into my calendula—and what hasn't—because I grow it organically. That makes it even more satisfying when I turn those pretty petals into something useful.
Preserve Calendula Petals
Here is how I preserve my calendulas:I always begin by completely drying the flowers. I spread them out in a single layer and let them dehydrate at 100°F (38°C) for roughly 72 hours.
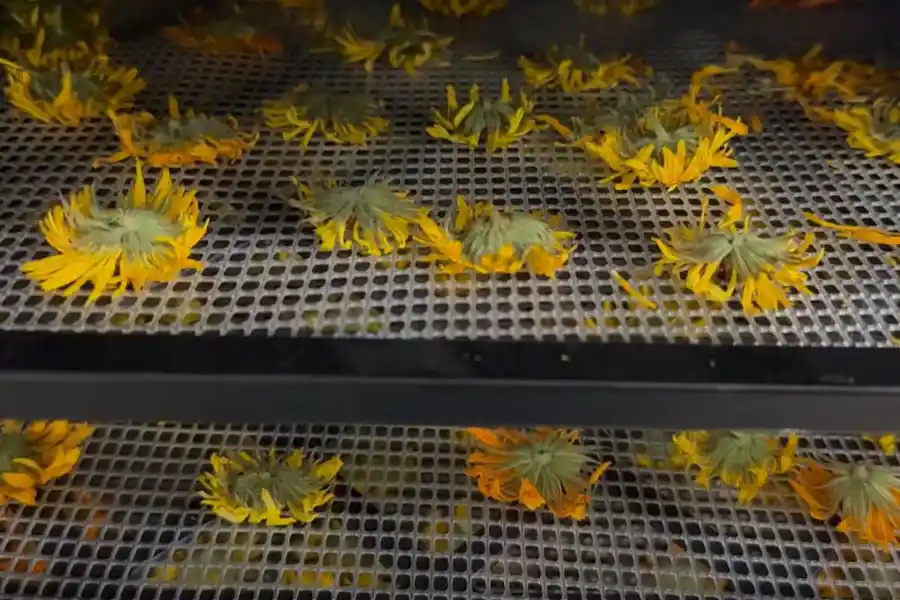
- If it’s sunny, you can spread the flowers out on a screen in a dry, shaded area. Occasionally, turn them until completely dry.
- Then, I keep those dried flowers in an airtight jar and label it carefully with the date.
You can keep those dried calendulas for a year if properly dried and stored.
Ways To Use Calendula
Oh, there are many ways. Here are the 3 simplest ways I use mine:
Tea
When I want a drink that helps me unwind and relax, calendula tea is my first choice. I soak 1 or 2 tablespoons of dried calendula flowers in a cup of hot water. It's also a delicious evening treat with a subtle, earthy flavor.
DIY Calendula Oil

I infuse the dried flowers into oils for making homemade salves. Calendula oil works well for sunburn, small wounds, and dry skin. It’s one of the easiest herbal projects you can try.
To Repel Insects In a Chicken Coop
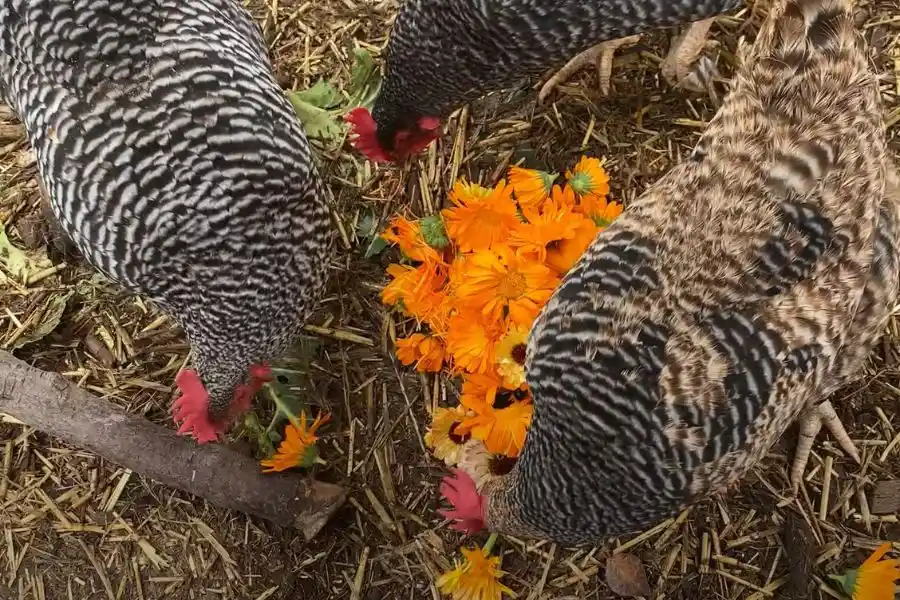
I add calendula petals, either fresh or dried, to the chicken coop's nesting boxes. My hens love it since it naturally repels insects. Plus, it gives their egg yolks the stunning, deep yellow-orange color.
Last Words
If you’ve never grown calendula before, trust me — you’re missing out. It is a plant that gives back more than it takes.
I've enjoyed having it in my room, and I'm sure you'll feel the same way after you've grown your first batch. So, collect some seeds, re-read my guide on “How to grow and use calendula”, and grow some yourself.